1. Condensed milk sponge cake
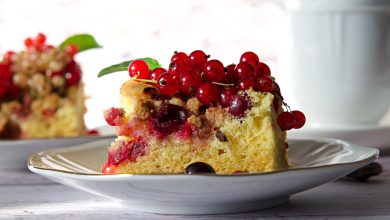
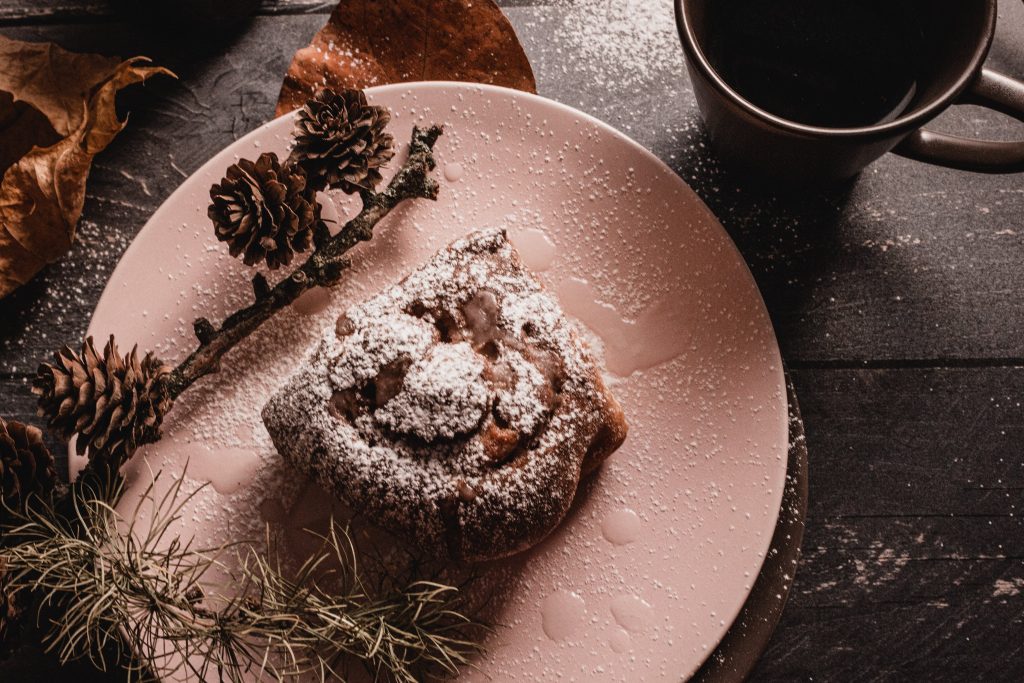
Condensed milk sponge cake is a delightful dessert with a rich and moist texture. The use of condensed milk adds sweetness and a creamy consistency to the cake. It’s a simple yet indulgent recipe, often appreciated for its ease of preparation. The condensed milk contributes to both the flavor and moisture, creating a luscious cake that’s perfect for various occasions. If you’re a fan of sweet, soft cakes, this one might become a favorite in your baking repertoire.
And the beauty of condensed milk sponge cake lies in its versatility. You can enhance the flavor by adding vanilla extract, or incorporate citrus zest for a refreshing twist. It pairs well with fresh fruits, whipped cream, or a dusting of powdered sugar for a finishing touch. Whether served as a tea-time treat or a celebratory dessert, the simplicity and decadence of condensed milk sponge cake make it a reliable go-to recipe for satisfying your sweet cravings.
A typical condensed milk sponge cake recipe usually includes basic baking ingredients such as:
- 1. All-purpose flour: Forms the base of the cake.
- 2. Baking powder: Provides leavening, making the cake rise.
- 3. Condensed milk: Adds sweetness and moisture to the cake.
- 4. Butter or oil: Contributes to the richness and texture of the cake.
- 5. Eggs: Act as a binding agent and help in leavening.
- 6. Vanilla extract: Enhances the flavor of the cake.
- 7. Salt: Balances the sweetness and enhances overall flavor.
These ingredients come together to create a soft and flavorful sponge cake. Remember, variations exist, and some recipes might include additional elements like citrus zest or other flavorings for added complexity.
Here’s a basic recipe for condensed milk sponge cake:
Ingredients:
- 1 1/2 cups all-purpose flour
- 1 1/2 teaspoons baking powder
- 1 cup sweetened condensed milk
- 1/2 cup unsalted butter, softened
- 3 large eggs
- 1 teaspoon vanilla extract
- 1/4 teaspoon salt
Instructions:
- 1. Preheat your oven to 350°F (175°C). Grease and flour a cake pan.
- 2. In a medium bowl, whisk together the flour and baking powder.
- 3. In a separate large bowl, cream together the softened butter and condensed milk until smooth.
- 4. Add the eggs one at a time, beating well after each addition. Stir in the vanilla extract.
- 5. Gradually add the dry ingredients to the wet ingredients, mixing until just combined. Be careful not to over mix.
- 6. Pour the batter into the prepared cake pan and smooth the top with a spatula.
- 7. Bake in the preheated oven for about 25-30 minutes or until a toothpick inserted into the center comes out clean.
- 8. Allow the cake to cool in the pan for 10 minutes, then transfer it to a wire rack to cool completely.
Here are a few notes to keep in mind when making a condensed milk sponge cake:
- House Temperature Ingredients: Ensure that your butter and eggs are at House temperature. This helps in achieving a smooth and better mixing of ingredients.
- Avoid over mixing: Mix the batter until the ingredients are just combined. Over mixing can lead to a dense cake. Stop when the ingredients are blended.
- Baking Time: Keep an eye on the cake as baking times may vary depending on your oven. Use the toothpick test—insert a toothpick into the center, and if it comes out clean or with a few moist crumbs, the cake is done.
- Pan Size: The recipe assumes a standard cake pan. If you use a different size, adjust the baking time accordingly. Smaller pans will require more time, while larger ones may need less.
- Customization: Feel free to experiment with flavors. Add citrus zest, a touch of almond extract, or even fold in chocolate chips for a twist.
- Storage: Store the cake in an airtight container at room temperature for a day or two, or refrigerate for longer freshness.
Enjoy baking your condensed milk sponge cake!
2. Homemade Garlic Rolls
Introduction:
Indulging in the irresistible aroma of freshly baked garlic rolls is an experience that awakens the senses and sets the stage for a delightful meal. The warmth of these golden delights, coupled with the savory essence of garlic, can elevate an ordinary dining experience to a culinary delight. In the following paragraphs, we’ll explore the magic behind crafting these heavenly rolls, uncovering the simple yet essential steps that transform basic ingredients into a mouthwatering accompaniment.
Baking garlic rolls at home is a rewarding venture that goes beyond the satisfaction of a tasty outcome. It invites you into the world of artisanal baking, where the process is as enchanting as the final product. The aroma of yeast mingling with the pungent allure of minced garlic creates an ambiance that sparks anticipation and sets the stage for a memorable mealtime experience.
Ingredients:
To start on this flavorful journey, bring the following ingredients:
Dough:
- 4 cups all-purpose flour
- 1 tablespoon sugar
- 1 packet active dry yeast
- 1 cup warm milk
- 1/4 cup melted butter
- 1 teaspoon salt
Garlic Butter Topping:
- 1/2 cup unsalted butter, softened
- 4 cloves garlic, minced
- 2 tablespoons fresh parsley, finely chopped
- Salt to taste
Recipe:
1. Prepare the Dough:
– In a bowl, dissolve sugar in warm milk and sprinkle yeast over it. Let it rest for 6-11 min until foamy.
– In a medium mixing bowl, combine flour and salt. Pour in the yeast mixture and melted butter. Knead until a smooth dough forms. Let it to rise in a hot place for about 2 hour or until doubled in size.
2. Shape the Rolls:
– Punch the dough and divide it into equal parts. Form each portion into a ball and place it in a greased baking tray.
3. Make Garlic Butter Topping:
– Mix softened butter, minced garlic, chopped parsley, and a pinch of salt in a bowl. Spread this mixture over the rolls, ensuring an even coating.
4. Second Rise and Bake:
– Cover the rolls and let them rise for an additional 30 minutes. Preheat the oven to 375°F (190°C). Bake rolls for 22-26 min or until golden brown.
5. Serve Warm:
– Once baked to perfection, these garlic rolls are best enjoyed warm. Serve them alongside your favorite dishes or as a standalone treat.
Notes:
- For a cheesy twist, sprinkle grated Parmesan or mozzarella over the garlic butter topping before baking.
- Experiment with different herbs like rosemary or thyme to personalize the flavor profile.
- These rolls can be made ahead and frozen before baking for a quick, freshly baked treat on demand.
Embark on this culinary adventure and savor the joy of homemade garlic rolls that will undoubtedly become a cherished addition to your repertoire.
3. Classic Old School Cookies
Introduction:
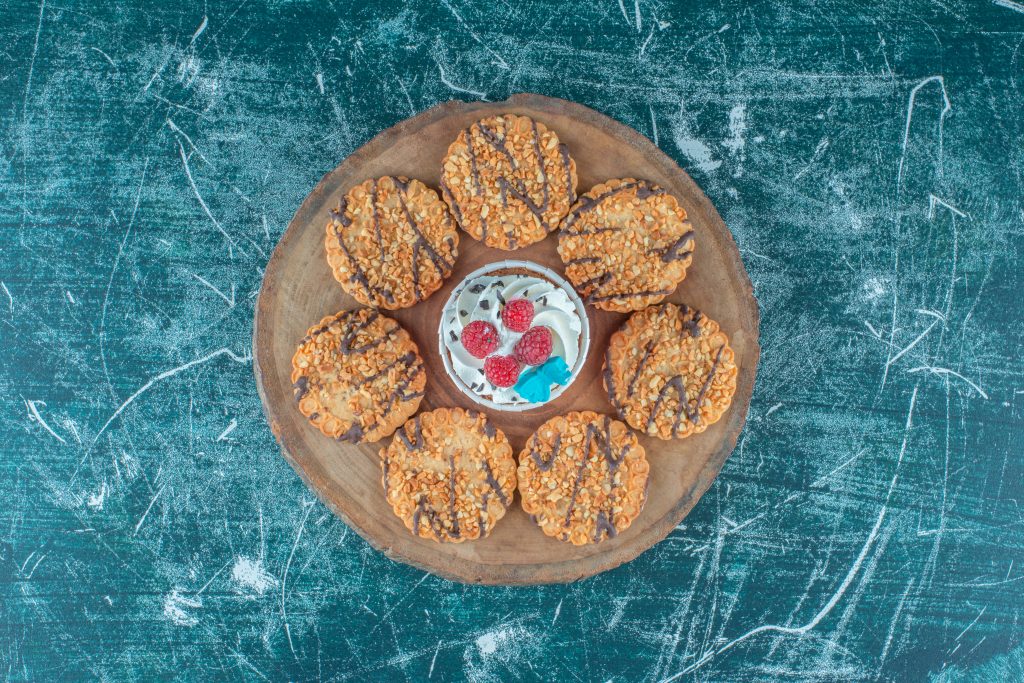
Nostalgia takes the lead when it comes to baking old school cookies — those timeless treats that evoke fond memories and carry the comforting aroma of a bygone era. These cookies, with their simple yet satisfying charm, have the power to transport us to a place where the kitchen was filled with laughter, and the anticipation of a freshly baked batch made every moment sweet. In the paragraphs that follow, we’ll delve into the world of old school cookies, celebrating the art of simplicity and the joy that comes with crafting these timeless treats.
The essence of old school cookies lies in their unfussy, traditional nature. These are the cookies that grandma used to make, invoking a sense of warmth and familiarity. The beauty of these treats is found in the balance of basic ingredients that come together to create something truly special. Flour, sugar, butter, and a few key players form the backbone of these cookies, proving that sometimes the most uncomplicated recipes yield the most satisfying results.
Ingredients:
Dry Ingredients:
- 2 cups all-purpose flour
- 1 teaspoon baking soda
- 1/2 teaspoon salt
Main Ingredients:
- 1 cup unsalted butter, softened
- 1 cup granulated sugar
- 1 cup packed brown sugar
Additional Ingredients:
- 2 large eggs
- 1 teaspoon vanilla extract
- 2 cups chocolate chips or chopped nuts (optional)
Recipe:
1. Preheat and Prep:
- Preheat your oven to 350°F (175°C). Line baking sheets with parchment paper.
2. Combine Dry Ingredients:
– In a bowl, mix together the flour, baking soda, and salt. Let it aside.
3. Cream Butter and Sugars:
– In a separate extra-large bowl, mix together the softened butter, granulated sugar, and browned sugar until light and fluffy.
4. Add Eggs and Vanilla:
- – Put in the eggs one by one, make sure each is well incorporated. Add the vanilla extract and mix.
5. Combine Wet and Dry:
– Add slowly the dry ingredients to the wet ones, mixing until just combined. Avoid over mixing.
6. Fold in Chocolate Chips or Nuts:
- If desired, fold in chocolate chips or chopped nuts to add an extra layer of flavor and texture.
7. Scoop and Bake:
– Add slowly tablespoons of dough onto the prepared baking sheets, leaving enough space between each ones. Bake for 11-15 minutes or until the edges are browned.
8. Cool and Enjoy:
– let it to cool on the baking sheets for a 15 min before you take them to a wire rack to cooler completely.
Notes:
- For a chewier texture, slightly under bake the cookies and let them continue setting on the hot baking sheet out of the oven.
- Experiment with different mix-ins, such as white chocolate chips, dried fruits, or even a pinch of cinnamon for added flair.
- These old school cookies are perfect for dunking in a glass of cold milk or pairing with your favorite hot beverage. Enjoy the simple pleasure of homemade goodness.